To find recipes:
Option 1 - click on the category on the right and scroll through choices
Option 2 - Use the search box at the top of the window to find a component, ingredient, or any other word
Option 3 - Scroll through the index on the right side and click on the selected recipe
E-mail new submissions to Jwgalson@gmail.com or dkgalson@gmail.com
Showing posts with label Jams. Show all posts

Saturday, March 11, 2023

Strawberry or Blueberry Preserves and Jam Making Techniques (Jessie)

Makes about 3 to 4 8 oz jars

Ingredients

2 lbs strawberries sliced or blueberries
1 and ¼ lbs sugar
3 oz fresh lemon juice for strawberries and 4 oz for blueberries (important to use for better preservation)
Lemon: do not use Meyer lemons (not acidic enough)

Directions

Preparing fruit:

Pick unblemished, not overly ripe, high quality fruit. Use V cut to remove stems of strawberries and remove any bruises. Use roughly 2 parts fruit to 1 part sugar by weight. Bathe fruit in water (don’t spray). Best for long-term preservation: low moisture, high sugar, high acidity.

Preparing jars:

Remove 2-part lid off new jars (note: lids are 1-use only; rims and jars are reusable). Be careful not to touch the sterile lids. Place the jars upright on a cookie sheet lined with a towel. Heat oven to 300F and turn oven off after a few minutes after placing jars in the oven. Keep the jars in the hot oven until ready for filling.

To sterilize jars and rims that have been previously used, place clean ones in a 250F oven on a towel-lined baking sheet for at least 30 minutes (keep in oven until ready for filling as above). Both jam and jars should be hot when filling.

Processing jars:

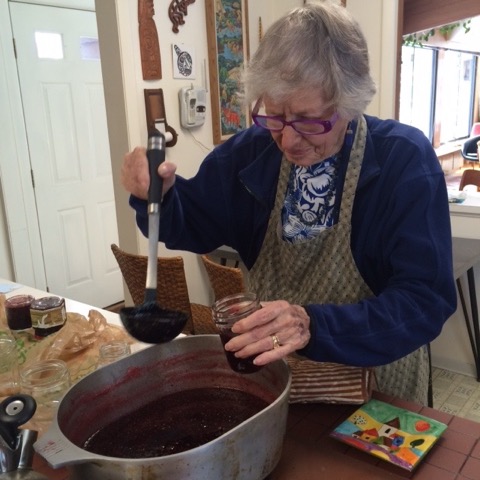
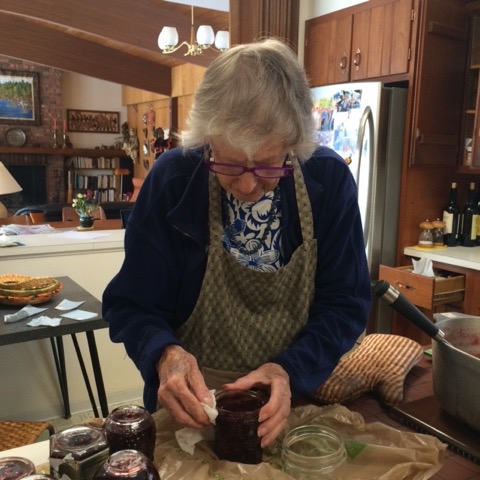
Have a pot of boiling water to clean cloths and scoop and another tall pot of boiling water for sterilizing jars. Fill jars leaving ¼ inch at the top (up to middle line) using metal scoop sterilized briefly in boiling water [can leave scoop in pot]. If you notice a spiral at the top of the jars, fill just to the middle of the spiral. Place lids on, tighten screw tops just a bit, wipe rims with a clean damp cloth dipped in boiling water, and place them gently in the tall pot of boiling water. Water level in pot should be about 3 inches above top of jars.  Process the jars for 20 minutes. Carefully pick up jars with tongs without tipping sideways and tighten lids. Place on a towel-lined counter or cookie sheet. Tap whole tray hard to release any air in jars. Allow to cool for 12-24 hours (without disturbing or jiggling them or wiping off water) at room temperature before stacking and listen for the sound of popping (can happen over hours). The top of the lid should be curving very slightly inwards in the middle. Keep in cupboard for about 1 year. If any jars are not sealed, it’s ok to keep in the fridge for a few weeks.

Cooking the Jam

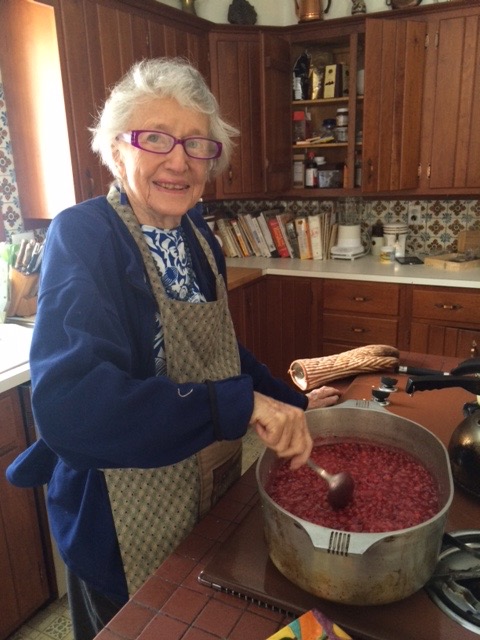
Place the cut-up strawberries (or blueberries), sugar, and lemon juice in the large copper or other pot (at least 12 quarts). Cook over medium heat until it begins to simmer and foam. Size of fruit pieces will determine chunkiness of jam. If there’s any resistance or sticking on the bottom, lower temperature. Once the mixture begins to foam, turn the heat up and stir continuously for about 20 minutes. As you feel the jam thicken, turn the heat down and stir continuously until you get to the gel stage (see below). Remove from heat and skim off foam.

Testing for Doneness

Spoon test: Pick up about ½ teaspoon of the liquid and roll it around the spoon to cool. Hold the spoon perpendicular at a slight vertical angle. If separate syrups drips form, it’s not done. If the drops run along the bottom edge of the spoon and collect into one big drop, it’s done.

Plate test:

Put a few drops on a cold plate. Run your finger through it and If it builds up like a wall, it’s set. If it runs in front of you and you can write with it, it’s not set.

Implements

-Wide pot (copper is best [cools quickly] or coated cast iron with enamel, or heavy stainless steel, non-reactive); suggested measurements are 11 inches at base, 15 inches at the rim, 5 inches high.
-Tall Pot for boiling jars (water level should be at least 3 inches taller than the tops of the jars)
-Canning jar lifting tongs -Metal scoop (eg, ¼ cup)
-Jam jars

Comments

Note about good strawberries in LA: Temai Farms Farmer John Givens Recommended products: Pomona’s apple pectin

Strawberry preserves:
Recommended book: The Blue Chair Jam Cookbook by Rachel Saunders
Recommended jam pot: could use a dutch oven (do not use a stock pot)

Peach preserves:
Do not use white peaches, white nectarines, or plums (all too watery)
For an herbal infusion: place herbs in a tea bag; mix sugar, fruit, juice, and tea bag together overnight and then cook jam.

Peach or Nectarine Preserves (Jessie)

Makes about 7-8 4 oz jars

Ingredients

2 lbs peaches or nectarines, pitted and sliced 1 and 1/2 lbs sugar 5 oz fresh lemon juice (important to use for better preservation) Peaches: Use freestone to easily remove pit. Good types are yellow and variegated (different colors). White peaches are too watery. Lemon: do not use Meyer lemons (not acidic enough)

Directions

Preparing fruit:

Pick unblemished, not overly ripe, high quality fruit and remove any bruises. Use roughly 2 parts fruit to 1 part sugar by weight. Bathe fruit in water (don’t spray). Best for long- term preservation: low moisture, high sugar, high acidity. Place fruit in a large bowl and cover with sugar and juice (can add an infusion if using). Toss lightly, cover, and place in the refrigerator overnight (more flavor from infusion) or use immediately.

Preparing and processing jars: see recipe for strawberry or blueberry preserves

Cooking the Jam

Place the fruit in the large pot heating on medium high until it begins to boil. Stir occasionally. Turn the heat down as the jam begins to thicken, stirring consistently after 10 minutes. cut-up strawberries (or blueberries), sugar, and lemon juice in the large copper or other pot (at least 12 quarts). Cook over medium heat until it begins to simmer and foam. Size of fruit pieces will determine chunkiness of jam.

Testing for Doneness
Spoon test: Pick up about ½ teaspoon of the liquid and roll it around the spoon to cool. Hold the spoon perpendicular at a slight vertical angle. If separate syrups drips form, it’s not done. If the drops run along the bottom edge of the spoon and collect into one big drop, it’s done.

Plate test: Put a few drops on a cold plate. Run your finger through it and If it builds up like a wall, it’s set. If it runs in front of you and you can write with it, it’s not set.

Implements

-Wide pot (copper is best [cools quickly] or coated cast iron with enamel, or heavy stainless steel, non-reactive); suggested measurements are 11 inches at base, 15 inches at the rim, 5 inches high.
-Tall Pot for boiling jars (water level should be at least 3 inches taller than the tops of the jars)
-Canning jar lifting tongs
-Metal scoop (eg, ¼ cup)


Comments

Comments: Good peaches in LA: Tenerelli Orchards (peaches.la); can order online Mirabelles: dkarp@ucr.edu (pre-order for Santa Monica Farmer's Market)

Refrigerator Pickles (Jessie)

Ingredients

Cucumbers: Use fresh and unblemished; the smaller the better Can use other veggies (eg, carrots, beets) but combine veggies of similar density Avoid any stems Brine: 3 cups vinegar (at least 5% acidity) 2 cups water ¾ cup sea or kosher salt Peppercorns Mustard seeds, etc Fresh dill A little sugar (optional)

Directions

Makes about three 16 oz jars Preparing jars: To sterilize jars and rims that have been previously used, place clean ones in a 250F oven on a towel-lined baking sheet for at least 30 minutes. Use new lids. Preparing veggies: Wash and set cucumbers in sterilized, hot jars. Leave ½ inch head space. Make brine and bring to a boil and pour over cucumbers. These should be fully submerged. Punch out any air bubbles. Seal and keep in fridge. Cucumbers will be ready in a few days but give carrots and beets up to a week. Will keep for about 1 month.

Implements

-Large pot -Sterilized jars

Comments

Good cucumbers in LA: Valdivia Farms Good dill in LA: Tamai Family Farms

Tuesday, August 2, 2016

Raspberry and Current Jam - From Eva


Ingredients

6 cups Currants
4 cups Raspberries (use 2/3’s sugar to berries)
7 cups Sugar

Directions


  1. Mix berries and sugar in pot over medium heat. Don’t forget to mix from the bottom of the pan. You need to stay around the kitchen for this whole Jam process so nothing boils over
  2. When mixture gets to a good boil all over, set the timer for 15 minutes. Stir periodically during this time.
  3. Stir for another 10-15 minutes but pretty often
  4. Boil the lids in a medium pot. You will taking one lid out at a time when you are ready to use it on the jar
  5. Start to check the fluidness of the jam. Pick up about1/2 teaspoon of the juice and roll it around the spoon to cool the liquid. Then slowly drop it off the spoon. When it forms like a thread or permanent drop …then the jam is ready to put in the jars
  6. Spoon off all the pink foam into a heat proof bowl
  7. Ladle the jam almost to the top of a jar, wipe around the inside and the outside of the jar to get all the stickiness clean with a wet paper towel. Tightly screw on a top and turn the jar upside
    down on the counter. The counter should be lined with a plastic or paper bag.
  8. Repeat for all the jars
  9. When the jam has cooled, you can turn the jars and store

Implements

Extra large pot
About 8 medium jars (start washing the jars in the dishwasher to sanitize)
Metal tablespoon to test jam
Heat proof little bowl for pink foam
Ladle to scoop out jam to jars
Medium pot for boiling lids
Grabber tool to take out each lid from the boiling water


Comments

Lovingly recorded by Diana


Tuesday, November 9, 2010

Orange Marmalade (Eva and Margo)

Ingredients
Oranges(cups) / Lemons / Water(cups) / Sugar
4* / 2 / 3**/ 6 cups
12 / 4 / 6 / 4 lb
32 / 6 / 12 / 7 lb
40 / 8 / 14 / 9 lb

*3 large naval oranges makes a little more than 4 cups, **increase water to a scant 4 cups, makes about 8-10 assorted jars of jam

Note: three very large naval oranges cut up may be about 5+ cups. Increase all quantities accordingly.

Directions
Cut oranges and lemons (half then quarter than cuisineart in little slices)
Cover with water and let soak
Boil 45 minutes
Let soak overnight
Add sugar and mix
Boil and stir until thick

This jam cooks in about 15-20 minutes. Test it for doneness by putting a small amount on a tablespoon, letting it cool slightly, and then letting it run off the side of the spoon back into the pot. When the last few drops sheet the spoon, and form thick hanging drops, the cooking is done.

Put the jars through a cycle in the dishwasher just before you cook the jam. Put the lids and scew-tops into a pot of water to cover, and simmer while you make the jam. Fish them out one at a time as you fill each jar

Take the pot off the heat, and stir for 5 minutes while skimming off the foam. (The foam can be put into a bowl and eaten, but it should not be on the jars that are sealed.). Fill the jars one at a time to within 1/8” of the top. Wipe the rim with a moist paper towel to remove any jam that has dripped on the edge. Take a lid and screw top from the simmering water. Place the lid carefully on the rim, and screw the top down as tight as possible. Immediately turn the jar upside down, and let it cool in that position. Proceed in the same way until all the jars are filled. When the jars are cool, they will be completely sealed, and can be stored at room temperature for months.

Implements
I usually save small attractive jars with lids throughout the year, but if you don’t have those, buy a box of Ball Jelly Jars. The box comes with lids and screw tops.

Comments
The soaking step should be in an enamel lined pot, if you have one. The cooking can be done in any pot as long it is at least twice as big as the volume of fruit and liquid. If you have a large enamel pot, both the soaking and cooking can be done in the same pot.

"For orange and lemon prep:  best to use blood oranges (second choice would be navel oranges) and unwaxed Meyer lemons.  After cutting oranges and lemons in quarters, remove seeds, tough corners, and some of the white pith.  Use the slicing blade of the Cuisinart followed by regular blade for remaining large pieces of rind."

Total Pageviews